Loose Natural or Loc’d, You Need Almocado Products In Your Life!

I was gifted Almocado Seaweed Shampoo and the moisturizing peppermint Daily Spritz by Youtuber Leecey Leece aka Lisa. She is an amazing person with a big kind heart. We’ve bonded over our not-so-good sisterlocks experiences and both have created videos speaking on them. We both desire to help others through our experiences so they can have better outcomes with their sisterlocks journey than we have. Lisa knows I have issues with dandruff and have been searching for other natural things to use on my locs besides the sisterlocks brand shampoos. I’m currently using the sisterlocks dandruff shampoo, which works just fine, but I’m open to using something else.

What is almocado?

They are a black-owned family business based in South East London. They make all natural, organic products specifically for those with kinky, coily hair. They have a line of gentle cleansers, deep conditioners, daily moisturizers, and protective balms that leave your hair soft and very manageable.

Over the weekend I tried the Seaweed shampoo and it left my locs feeling amazing. First, I got an instant lather. It wasn’t too much lather, but just enough. Second, I love the way the shampoo smells and feels. It’s almost a clear color and a little goes a long way. I felt the difference in my hair after the first wash. By the second shampoo, my hair felt light and silky. I didn’t try the Peppermint Daily Spritz until Sunday night. I spritzed my hair with it and followed it with my Wild Growth Moisturizing Oil on my ends. I plaited my hair in small plaits so I could have curly definition the next morning. The entire night I smelled the gentle smell of peppermint and it made me happy!
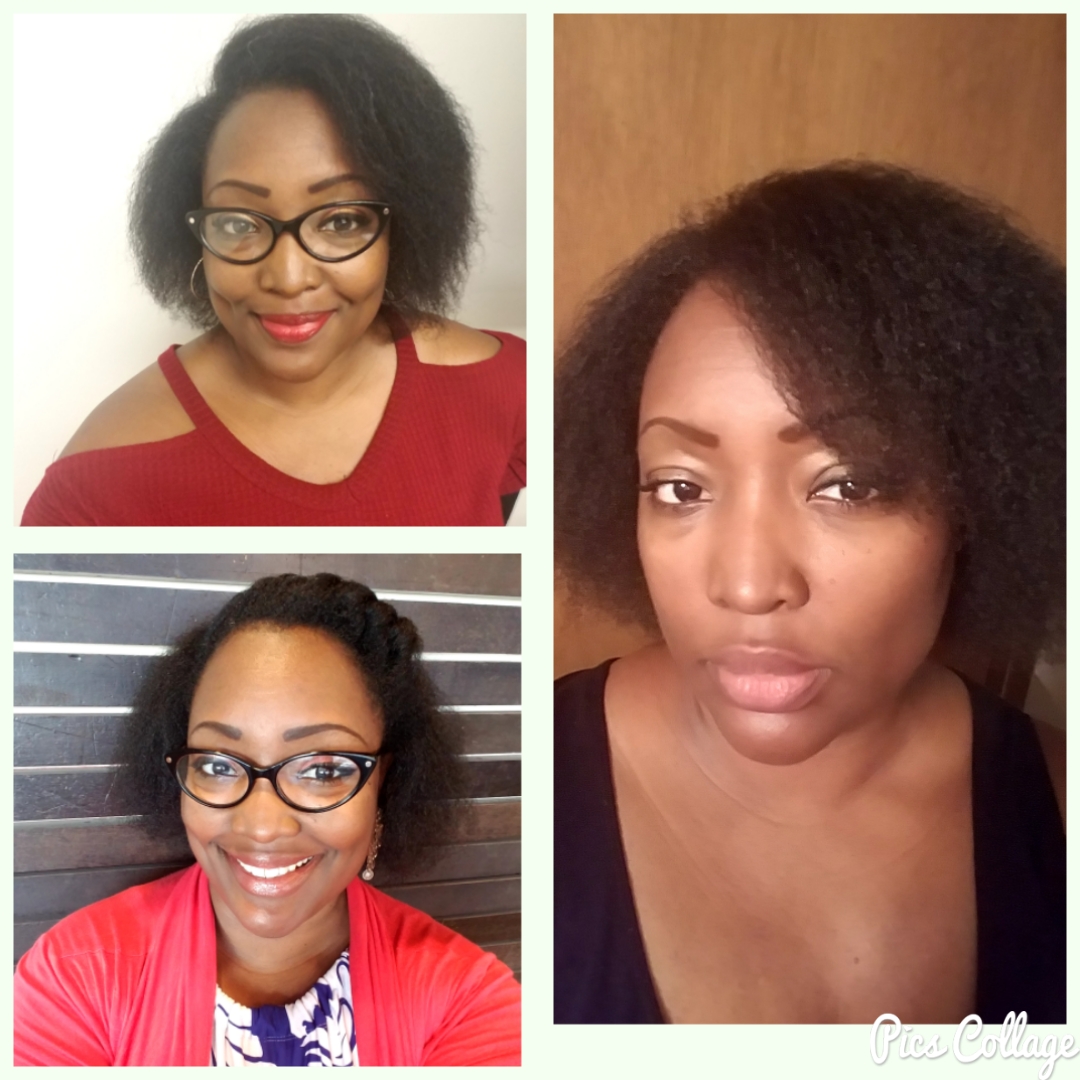
Plait out results

My Plait Out Results. #Definition

Monday morning when I took my plaits down I had very defined curls and waves and my hair still feels soft and smooth. I’m in love with this line of products and I can’t wait to try more! Next on my list is the Peppermint Tea Tree Shampoo which is supposed to be great for dandruff issues. What I love about Almocado is that their products can be used on loose natural hair or loc’d hair. So my daughters, who have loose natural hair, can use and benefit from their products as well.

Support black businesses!

But don’t support just because it’s a black business. Support because they are a black business that sells great products. I’ve never been one to blindly support someone just because. I’ve tried two of their products and I can confidently say that they offer great quality products made from the finest ingredients. Please go to https://www.almocado.com/ and read up on the business, what they offer, and then purchase.

Glutton For Punishment

Seriously. I don’t know why I insist on doing these spur of the moment, last minute things when it comes to my hair. This morning for an example, I decided at about 7 am to attempt the typical wash and go on my hair, not like the quick one I did two weeks ago. So I found a wash and go video on YouTube for a refresher and then tried to do it. I even went under the hooded dryer to dry my hair quicker versus letting it air dry.

Let me tell y’all…when I say my hair was a crunchy hot mess, I mean every word of that!! I’m laughing now as I remember how much of an epic FAIL my rushed, last minute wash and go was! First I co-washed. Then I used my leave in conditioner, a little oil, and gel. Normally that would work for your typical wash and go, right?

Here is the learning lesson: Before I attempted any of this, my hair was not pre-pooed, it was not well moisturized at all. It was very, very DRY. In order for your curls to pop and for a wash and go to work, you must keep your hair well moisturized. I had been quite lazy since my last wash. I semi-straightened my hair with the electric hair brush and have been wearing it that way ever since. I’ve been walking around with dry, stretched hair. Yes, I know better.

So, back to the sink I went to shampoo my hair after my failed wash and go attempt. With my hair soaking wet, I added my leave in, quickly oiled my scalp with my special oil blend, and put in my homemade whipped mango butter. I put my hair in a puff and got ready for work. My takeaway from all of this is I still have some work to do when it comes to getting my hair healthy and keeping it healthy. My laziness has once again come back to bite me in the butt. And we won’t even talk about the uneven hair I’ve noticed at the crown of my hair. Breakage. Again. This time I have a pretty good idea of what caused it. The head scarf I was using to tie my hair up at night. Sheesh…

Here is how I rolled in to work today. And it’s still wet. LOL! If you take nothing else from this, please let me be the lesson for what NOT to do! xoxo

SJ 8-16


Stretched & Straightened Hair

This has been one of the most humid summers to date in my neck of the woods. I took down my micro braids in early June and it’s been a challenge finding ways to to style and protect my natural hair. The majority of the time I let my afro flow freely. However…I also found it more difficult to deal with my hair in it’s constant shrunken state. I would plait my hair, tie it up, and it would be stretched, but by the time I made it to work, some serious shrinkage have already taken place.

I’ve done heatless stretching on my hair by doing the banding method or braiding or plaiting my hair and it worked just fine…during the winter months without any humidity. It’s summer now and I wanted something that would take less time and last a little longer in this humid weather. As my family and I were preparing to go out of town a few weeks ago, I decided to straighten my hair with a straightening brush.

Straightening brush

Most straightening brushes look similar to this one pictured above, including mine. I only wanted to loosen my tight curls, not get it bone straight, so I only ran the brush through my hair twice at a 400 heat setting. I figured that after shrinkage took place, it still would be easier to deal with, and I was right. About two weeks later I used the brush again. At night I would plait up my hair in medium sized plaits and tie it up. In the morning I take them down and finger comb and go.

What also helps me in the stretching process is castor oil or Blue Magic hair grease. I have thick, coarse hair, so I need those heavier oils. The only thing is when using oil or grease, you need to be more diligent about washing your hair. Make sure you use a clarifying shampoo to help clear away any and all buildup.

In the photos below you see my hair after having used the brush, but significant shrinkage has also taken place. Despite the shrinkage, my hair has been more manageable. I know constant use of heat is not good for your hair, and I’m not going to use the straightening brush again for a while, but it’s a nice option to have when you want to do something different. Or when you’re simply trying to fight the heat and humidity. And since I hadn’t stretched or straightened my hair in quite some time, it was nice to see my growth progress.

stretched hair

Here We Go Again…

eye roll

Lately there’s been this uproar in the natural hair community over Shea Moisture’s new online ad that in the short clip, seemed to only feature white women who claim to have “difficult hair” and have been “hair shamed” for whatever reason. The only woman of color in the ad was a young lady who looks to be of mixed race heritage with long curly hair. You can watch the video here:

http://www.thefader.com/2017/04/24/shea-moisture-video-hair-backlash

Before I go on, if you’re unfamiliar with the brand Shea Moisture, it’s a brand that made natural hair products for African American hair. The CEO of Shea Moisture said the ad was an oversight and that they didn’t mean to alienate black women. Mind you, Shea Moisture was created for black women, was supported by black women, and became successful because of black women. So I understand the uproar expressed on social media regarding the message Shea Moisture sent with this new ad campaign. The execution of the ad was horribly done. In that short clip it didn’t show black women, but in the full clip, it shows black women. What’s that saying a bout first impressions?

Here’s the thing: Companies and brands expand all the time. They try to reach broader audiences because they want money from everybody’s pockets. In Shea Moisture’s case, it’s the way they went about trying to target the other dollars that left a bitter taste in many mouths. Me personally, I haven’t bought Shea Moisture products in quite some time. If I don’t catch it on sale, I don’t buy it, and that’s with all products.  I find that most products on store shelves that are made for African American hair teeter on the expensive side. That in itself is a huge issue for me. Yes, I want to support black businesses, but good grief! Spending $20 and up on an 8 oz jar or smaller of a product is just too much for this sista that’s on a budget! But that’s a story for another day.

Most of you know that I’m big on DIY products. If I can save a buck or two I will do so. Every once in a blue moon I’ll try a new product, but for the most part I stick to my more reasonable products or I’ll I make my own and I rock with it until I perfect a recipe that suits my hair needs. I guess that’s why when I read about the uproar with Shea Moisture, I rolled my eyes because at the end of the day, sometimes you’re better off learning how to make your own products or going with a smaller brand that’s less expensive but still effective. Many accuse Shea Moisture of changing/watering down it’s product, and Carol’s Daughter has been accused of the same. I don’t use their products to be able to give an opinion, but both claim they have not. I can see formula change as a valid worry for naturalista’s, especially when the company has been sold as in Carol’s Daughter case.

I’m not as upset about what Shea Moisture is trying to do as others are, I’m more disappointed in the execution. At the end of the day Shea Moisture is a business, but for black women, we felt we finally had a company that made and sold products just for us and our natural hair needs. We no longer were forced to use shampoo’s and conditioners that weren’t made for our hair. Now with this new direction that Shea Moisture is going in, many loyal black Shea Moisture customers feel betrayed. Black women are the ones who were fiercely loyal and supportive of a brand that dared to bring forth a line exclusively for African American hair, and this is how we’re treated. I get it and I empathize with those feelings. But we must remember, at the end of the day it’s about dollars and cents. Nothing else matters to these companies. Not even customer loyalty.

DIY Shampoo Using African Black Soap

shampoo

shampoo

I’m giddy with excitement because I made my first DIY shampoo and it was so simple! This is something I’ve been wanting to do for a very long time and I finally bought the main ingredient, African Black Soap.

The benefits of African Black Soap:

  • Black soap is made with rare tropical honeys that are known for softening the skin and creating a smooth surface.
  • Black soap is also a natural source of vitamins A & E and iron. This helps to strengthen the skin and hair.
  • Black soap contains a high amount of glycerin, which absorbs moisture from the air and literally deposits it into the skin, making the skin soft and supple.
  • For centuries, Ghanaians and Nigerians have used black soap to help relieve acne, oily skin, clear blemishes and various other skin issues. Many swear by it for skin irritations and conditions such as eczema and psoriasis.

With that being said, here is a simple recipe I’ve found. Please be aware that you must be the judge of the amount you make based on your needs. I decided to make enough to fill a 32 oz bottle that I had, so here’s what I did:

What you’ll need:

  1. Big pot
  2. Water
  3. Cheese grater
  4. Big bowl
  5. Funnel
  6. 1/2 (or less) bar of African Black Soap
  7. Jojoba oil
  8. Vegetable Glycerin
  9. Vitamin E oil
  10. Tea Tree oil
  11. Rosemary essential oil

*Feel free to add or substitute oils you desire such as argan oil, lavender essential oil, neem oil, etc. I used what I had on hand.

Directions:

  1. Add enough water to your pot to fill whatever bottle or container you plan on storing your shampoo in. Bring it to a boil and remove it from the heat.
  2. Take your cheese grater and grate the amount of black soap you want to use for your shampoo. I used half of a bar based on the amount of shampoo I wanted to make. Grating the soft soap helps it to dissolve quickly in the water instead of having to wait hours or overnight like other DIY recipes call for.
  3. Add the soap to a large bowl and pour your hot water over it.
  4. Add your oils to the water and soap.
  5. I used the following amounts for my mixture:
    1. 2-3 Tbsp of Jojoba oil
    2. 1 – 2 tsp of Vegetable Glycerin
    3. 1 -2 Tbsp of Vitamin E oil
    4. 1 Tbsp of Tea Tree oil
    5. 10 drops of Rosemary essential oil
  6. Stir your mixture. You’ll notice how quickly your black soap dissolves. Keep stirring until you no longer see any chunks of soap.
  7. Allow the mixture to cool before transferring to your bottle. Once your mixture has cooled, use your funnel to transfer the liquid into your bottle. That’s it! Your shampoo is ready for use!

If you’re wondering why so many oils are used, it’s because African soap alone can be very drying to your hair, so that’s why it’s good to add additional oils, especially if you’re prone to dry hair. Oils that help retain moisture such as jojoba and argan are great to use.  Again, use as little or as much as your hair needs.

My Results: The African Black Soap shampoo lathers easily, so you don’t need to use much for a good wash. Your shampoo won’t be thick in texture but will be watery, so don’t be alarmed. After shampooing twice, my hair and scalp felt very clean and soft. I followed it with a sage and rosemary tea rinse, rinsing my hair several times with the tea.

I put my bottle of shampoo in the fridge just to be on the safe side. Prior to washing your hair again, just take it out of the fridge and let it get room temperature before using.

If you’re like me and are looking for the healthiest, natural DIY solutions for your hair that are also money savers, this is an excellent DIY shampoo recipe to keep and use. I apologize for not posting any photos of the shampoo itself. I forgot to take a picture of it while mixing it in my bowl! 😦 Till next time… xoxo

Lessons Learned

Lessons learned

I’m  coming upon my third year of being natural, and boy have I learned some things! The number one thing I’ve learned is that being a lazy natural is not the business. You will cause yourself a lot of unwanted damage to your hair and grief to yourself. Let me help you not make the same mistakes that I made with some suggestions:

  1. Do not ignore your ends! Get regular trims or give yourself regular trims. I cannot stress this enough. This was the biggest mistake I’ve made since being natural. DO NOT ignore your ends. Just last night I cut A LOT of damage off of my hair, and I’ve been doing so every so often to try to get rid of the damaged ends – and there’s a lot. I have no one to blame but myself because I did not take heed to a lot of the advice given by other natural’s and professionals.
  2. You must come up with a regular hair care routine and STICK WITH IT. If you wash your hair once a week, once every two weeks, or once a month, stick to your plan and do not be lazy about it. Moisturize, deep condition, give yourself regular scalp massages. I saw much better results when I started to stick to a regular hair care routine.
  3. Do not be afraid of trying different protective styles. Braids are not the only protective style out there. Try wigs, crochet wigs, sew ins, etc. There is nothing wrong with braids, but if they are done too tightly then you’re defeating the purpose.

This past year I experienced scalp irritation (unexplained pain and a bald spot, and breakage in one concentrated area) which turned out to be a blessing in disguise. It made me more aware of how I was treating my hair and scalp, and I was actually being too rough on it and scratching too much. I began to use a dandruff shampoo to help with my dandruff and itchy scalp issue, and I’ve now included pumpkin seed oil into my hair care regimen.

I’ve bought myself a pair of professional scissors to cut my hair, and I’ve been doing my own trimming. I’ve been gently flat ironing my hair just enough for me to see what my ends looked like, and then I cut. Eventually I will find my way to a professional, but in the mean time I like taking responsibility for my hair whether if it grows or breaks off. I know that may sound crazy, but that’s how I feel. I know my hair is super uneven, and I’m ok with that. I don’t care about uneven hair right now. I care about HEALTH. If there’s one thing about hair, it will always grow back (unless you have a condition like alopecia or some other condition that causes permanent hair loss).

I’ll be honest, I’ve had my freak out moments, moments of self doubt wondering “Should I just cut it all off again and start over?” Matter of fact I thought about cutting off all of my hair and starting all over just last night! I shared that with my husband and he said “You’re overreacting.” He was right. Sort of. 😉 Even though I’m three years in, I have to keep reminding myself that this is a journey. It has it’s highs and lows,  but you have to keep going. You have to make the best of whatever situation you’re in. It’s funny to read my earlier blogs from when I first went natural to where I am right now. I was very naïve about some things, but experience is definitely a teacher! Lesson learned.


The Benefits of Using Red Palm Oil

Red Palm Oil

As I take on the battle of breakage, bald spots, and very dry natural hair, I’ve gone back into research mode. I’ve stumbled upon Red Palm oil. There are so many benefits of using this rich oil from cooking with it, using it on your skin, or what I’m more interested in, using it on your hair. It contains the hard to find toctrienols, which are members of the vitamin E family. The common form of vitamin E, tocopherol, has long been used to treat many skin ailments and is found in many anti-aging products. Here are some of the many benefits of Red Palm Oil:

Red Palm Oil is loaded with the following phytonutrients:

  • Carotenoids (alpha-,beta-,and gamma-carotenes)
  • Sterols (sitosterol, stigmasterol and campesterol)
  • Vitamin E (tocopherols and tocotrienols)
  • Water-soluble powerful antioxidants, phenolic acids and flavonoids

Subsequently, the health benefits of palm oil include reduced risk of a variety of disease processes including:

What about the benefits for the hair, you ask? Well, it is a wonderful moisturizer especially since it’s loaded with vitamin E and other healthy vitamins. Red Palm Oil can be used as a pre-poo, deep conditioner, or a daily moisturizer. To use as a pre-poo, wet your hair with water from a spray bottle. Make sure you wear an old t-shirt that you don’t mind getting dirty because Red Palm Oil will stain. You do not need to use a lot of the oil unless you have really long hair. A little of this oil goes a long way. Section off your hair and work the oil through from root to tip, finger detangling as you go along. Make sure to massage the oil into your scalp as well. Continue this process until your entire head is done and then put on a plastic shower cap and let it set for 30 minutes to an hour. Shampoo with warm water 2-3 times to ensure that you get all of oil out and then proceed with conditioning.

Others use it as a daily moisturizer, some mix it with their favorite shampoo, while others mix it with their favorite conditioner. Either way your hair will reap the benefits of being very moisturized, soft and have a lot of body. Your hair will stay this way for at least a week or until your next wash.

I plan on incorporating the regular use of red palm oil in my pre-wash routine and then following up with the L.O.C. method every night. Consistency is key! No more being the lazy natural that I used to be. I’ll keep you posted on my results.

If you’re interested in purchasing Red Palm Oil, it’s available on Amazon and in most health food stores.

Washing Your Hair With Braids

Since I’ve been getting braids in my hair, and this dates back to the mid-90’s, I’ve always struggled with the proper way to wash and dry them. I’ve heard not to wash them in the shower because the water pressure and the heaviness of wet hair pulls on your edges and roots, which can cause breakage and for braids to come out. I’ve heard that you should let your braids air dry, I’ve heard that you shouldn’t let them air dry because it takes too long and the synthetic hair can mildew which can lead to other issues. I’ve also heard that you should blow dry your braids after washing, or strictly towel dry.

Over the years I’ve tried all of the above suggestions and decided to just blow dry my hair. Depending on the length of my braids, I typically wash them in the shower and am careful to hold them up and not let them hang completely down because they become so heavy with the weight of the water. I also try to make my washes as quick as possible so I don’t risk losing braids. Losing braids is my number one complaint when it comes to washing my hair.

Another thing I’ve learned to do over the years is to limit the amount of times that I wash my hair with braids. I typically keep my braids in for 3 months, and during that time I will wash my hair two times tops. Here’s why:

  • The more you wash your hair with braids, the frizzier your hair becomes. Your natural hair will begin to peep out from your braids, and your roots and new growth will also become more noticeable and bushy. No one wants to walk around with braids that look old when you’ve only had them in for one or two months! That is what happens when you wash them too often.
  • You risk losing braids. I learned this the hard way early on when I first began to get braids. The more you wash the more braids you will lose. Losing braids can also cause breakage because sometimes it takes out your hair, especially if it’s around your edges. SAVE YOUR EDGES LADIES!
  • I don’t use a ton of products in my hair when I have braids. I stick to the natural oils (my staples) to keep my hair moisturized while I have braids: Olive oil, coconut oil, Jamaican Black Castor Oil, and tea tree oil. I will put these in a bottle with water and spritz my hair and scalp every other day. This also helps with itchy scalp. Some people use leave in conditioners, but that to me leads to product build up which will require…yup, you guessed it, more washing. Please remember these are only my personal findings. There are those who strongly believe that you should continue to condition your hair while you have braids, but if you can find a leave in that doesn’t cause a lot of build up then go for it!

Recently I’ve been hearing a lot about dry shampooing. I began to Google products, specifically products for braids. One of the products that piqued my interest is Organic Root Stimulator (or ORS) Herbal Cleanse Shampoo.

Organic Root Stimulator

That led me to a YouTube tutorial by vlogger ThikandKurly.

https://www.youtube.com/channel/UC-853b-w5mZGUesdLxOgVQQ

I found her video to be very helpful, and the process was quick and easy, which I need as a busy working mom and wife. I went to Amazon and bought Organic Root Stimulator Herbal Cleanse Shampoo and tried it this weekend.

Pros:

  • Very easy to use and apply to your scalp and braids. Instructions couldn’t be simpler.
  • I love the instant tingly sensation you feel as you  massage the product into your scalp
  • It’s not messy, there’s no dripping and there’s no need to worry about staining your clothes
  • My scalp felt clean and refreshed immediately, and my braids smelled clean.

Cons:

  • Very strong smell! It definitely smells like a cleanser. BUT…over time it wears off.

After I finished the process of cleaning my scalp and braids with the dry shampoo, I moisturized my scalp and braids with coconut oil, and I applied a little Jamaican Black Castor Oil on my edges. Simple, easy, and the entire process took less than 20 minutes. I only wish I had found this product sooner, like when I first got my braids installed. Either way, I’m glad I found it and I will keep it on hand for myself and my daughters whenever we get braids.

For step by step instructions on how to clean your braids with the dry shampoo, definitely check out the link I provided above to YouTube vlogger ThikandKurly. I hope this helps, and if you have any suggestions – products or otherwise – please feel free to share!